Smith
Engine which attempts to emulate Sith engine titles.
Project maintained by bahstrike Hosted on GitHub Pages — Theme by mattgraham
Introduction
Please be aware that Smith is in active development. This means that the documentation provided here may not accurately reflect the current state of the engine as made available on the main page. That said, this page should provide very useful information to playtesters and anyone wishing to just mess around in the game.
Command-line arguments
The following command-line arguments can be used stand-alone or as part of the batch file generated/used by JED/ZED. Some arguments are useful for the development environment. The complete and unadulterated list is presented here.
Before diving into the details, it should be noted that you can adjust your JED/ZED level’s batch file to point to Smith.exe rather than JK.exe and it will work just fine.
| Argument | Description |
|---|---|
| -smith | skip splashscreen, go directly into smith |
| -ned | skip splashscreen, go directly into ned |
| -demo | force demo mode |
| -fullscreen | smith will launch into same fullscreen mode as pressing F12. as a commandline argument, is intended to be used in conjuction with -smith and -path / -jkl to autoload a level into fullscreen game mode |
| -path XYZ | loads/launches the directory or file (gob/goo) specified. can be a full path, or is otherwise relative to jk directory. if folder is specified, all gobs are loaded in the target folder; eg. for enabling mods. if a level is specified, you can use -jkl in conjunction to autoload a particular level upon startup (ned uses this). |
| -mots | launch in MOTS mode from the get-go |
| -p2pport PORT | specify an arbitrary port for use in multiplayer. useful if you have specific firewall rules, or are trying to playtest multiplayer using 2 clients on the same machine |
| -connect IPADDRESS | attempt to connect to the specified IP immediately during launch |
| -host | put the local client in hosting mode immediately during launch |
| -noaudio | completely disable audio |
| -dumpdebug | turn on dumping asset data to c:\smith\tmp\ |
| -neo | make neo mode active automatically |
| -giveeverything | attempt to set every inventory slot available and full after level load. must be used in conjunction with -path. useful when added to a level’s “Save JKL and Test” batch file for JED/ZED |
| -dumbai | pre-selects the “Dumb AI” checkbox to disable AI logic |
| -autonetdebug host | only intended for development environment. launches Smith in host mode and also launches an additional client instance with a different port and directed to connect to the first instance. this allows debugging as multiplayer host |
| -autonetdebug client | only intended for development environment. launches Smith in client mode, but pauses in order to launch an additional host instance, and then connects to it. this allows debugging as multiplayer client |
| -nodump | only intended for development environment, as the dump option is off in Release builds; enforces that the debug file dumping option is off |
| -forceprecache | forces asset precaching during level load. this eliminates stuttering during gameplay but increases level loading time. normally this is on, but in debug builds or when launched with -path then it is defaulted to off; you can force it on with this option |
| -noprecache | disables asset precaching during level load. this makes level loading nearly instantaneous but performance stuttering will occur during gameplay when new textures/models are encountered |
| -vr | forces vr mode; intended for development environment (case sensitive) |
| -novr | forces no vr mode; intended for development environment (case sensitive) |
| -ignorejed | disables attempt to sync cameras with jed/zed. does not affect ned |
| -mini | starts as small window with no side panel |
| -jkl XYZ | mainly for JED/ZED/NED integration. specifies which JKL file to autoload |
| -teleport XYZ | upon initial spawn, teleport player to specified location. use frame string (x/y/z:p/y/r) in quotes. eg -teleport “(0.2/0.0/0.2:0.0/90.0/0.0)” |
| -clearbvhcache | mainly for JED/ZED/NED integration. cleans up any existing sector BVH cachefiles for level when loaded; ensuring it gets rebuilt |
| -bumpmapdebug | creates a folder c:\smith\bumpmaps\ which will read/write textures and their associated normalmaps |
| -rebuildbumpmapsgob | generates a new bumpmaps.gob from all normalmaps within c:\smith\bumpmaps\ |
| -stresstest [time] | autoloads random levels repeatedly forever. if time is specified, this number of seconds is waited between switching levels. if omitted, the default is 10 seconds. the maximum load/unload cycle stress test is -stresstest 0 -noprecache |
Command-line examples
The commandline arguments are often useful in combination to achieve particular goals. A few examples are presented here.
Launch Smith with mods
This will simply behave like JK, in that you can launch smith with the desired mods.
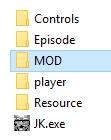
smith.exe -smith -path MOD
Launch level fullscreen
This will simply launch the specified level in full screen mode; pressing escape or otherwise closing the window will cause smith.exe to exit.
smith.exe -smith -fullscreen -path "C:\Users\Strike\Desktop\JK\Episode\SMHQ.gob" -jkl "smhq.jkl"
Bumpmap development
Launching smith like this will generate a folder c:\smith\bumpmaps\ where you can edit and add bumpmaps.
smith.exe -bumpmapdebug
When finished, you can run smith like this to rebuild the bumpmaps.gob file.
smith.exe -rebuildbumpmapsgob
NOTE: Make sure to check the Renderer tab for enable/disable bumpmaps, as well as their strength.
JED/ZED Integration
There is a huge benefit to using Smith to playtest your levels over JK, for two reasons:
- Faster
If Smith is launched via the “Save JKL and Test” option in JED/ZED then there are no menu items to click-through and there is no compatibility problem with modern PC hardware. It will just drop you right in your level.
- 3D Preview Synchronization
You can have Smith teleport you to JED/ZED’s 3D Preview camera position during launch, and teleport JED/ZED’s 3D Preview camera position to where you were when you close Smith. Since memory locations change, there is a calibration step the first time you playtest a JED/ZED level in Smith; but from that point on (until you close JED/ZED) the memory location is saved. This, in combination with the faster loadtime and no menu clicking, means it is not nearly as much of a hassle to correct a surface not flagged as sky or a cog not working right.
Options
Main
There is an episode list that lets you load a level by simply clicking on it.
There are checkboxes for Mouse Invert, MOTS, and Allow Music. The MOTS checkbox will shutdown and relaunch the internal engine when toggled. The Allow Music checkbox will allow loading and playing of MP3 copies of the CD audio if music.cd is present and the particular level is set up to play music.
There is a JK Path… button that lets you choose the root directory for your JK/MOTS installation. If you want to support both JK and MOTS then it is suggested that you ensure the JK and MOTS episode and resource files are both present in the same corresponding Episode and Resource subdirectories.
The bottom section of the Main tab is the log file scroll. This is a live display of the messages that are also appended to the logfile created within the same directory as the Smith executable. It should be noted that normal closing of the Smith application does automatically delete the log file; if you want to intentionally preserve the logfile then you should use Task Manager to kill the application.
Fun
These are just silly things.
Transform Player
I just happen to like some of these options. I’m not sure if the “By Powerup” checkbox still works, but its original intent is to transform you into a random actor that uses the same weapon type as the powerup you collect.
Cheats
I think these are mostly self-explanatory except the “Dumb AI” option literally just prevents all of an actor’s AI logic from running. So its not just that they ignore you, the player, they won’t talk or move to waypoints or anything. Handy if you want those clowns to leave you alone while testing something specific.
I know Kung Fu
Neo mode.
Lets you fly, go through walls, and changes the render mode to wireframe when you’re outside of the level bounds. Hold SHIFT to move faster. When you’re outside of the level bounds, hold ALT to do a cool procedural wireframe rendering of the level (not really sure how to explain it). The Q/Z keys let you fly up/down. All I see is blonde, brunette…
Remember this can be activated automatically by using the commandline argument “-neo”. You can add this to your JED/ZED level’s batch file.
AI buttons
I don’t think these work anymore.
Engine
Sector BVH
Enables use of the sector bounding-volume hierarchy optimization. Generally should improve engine performance substantially. If this option is off, or during initial level load and before the background thread has completed generation of the BVH, then a brute-force approach is taken when determining sectors for various engine tasks including physics.
The Render Debug option will show you the sector BVH framework. Top-level nodes are brighter but, since there’s usually so many, the darkness levels off pretty quickly.
Thing BVH
Enables use of the thing bounding-volume hierarchy optimization. Generally should improve engine performance substantially. If this option is off then a brute-force approach is taken when determining nearby things for various engine tasks including physics. It should be noted that, in contrast to the sector BVH, this is a dynamic BVH and so any moving things are removed/reinserted continuously and their bounding volume is expanded to include not only their current position/size but also their projected position/size for the next frame.
The Render Debug option will show you the thing BVH framework. Top-level nodes are brighter, but, since there’s usually so many, the darkness levels off pretty quickly.
Miscellaneous
Debug GUI
Shows some insight into the COG engine. The recent syscalls and VM instructions are displayed, as well as their rates.
Performance Info
Shows how long (in seconds) each major component of the engine is taking per frame. This is useful for diagnosing performance problems. It should be noted that the Debug GUI and Performance Info options both attempt to use the same area of the display for rendering so they might not be able to display at the same time.
Destroy all things except player
Does exactly as it sounds. Useful for debugging circumstances when you want to be able to set breakpoints in the code that won’t be triggered by a zillion things.
COG Synchronicity
Normally, COG messages will attempt to complete their execution at the very instant they were issued. However, if a Sleep(); or WaitForStop(); is encountered then the COG virtual machine will release control to the overall engine until next frame where it will check the condition again.
This is still an active area of research, but for performance reasons Smith will also temporarily halt the execution of a COG if it is taking too long; and will resume execution during the next frame.
This slider controls the cut-off point. The default is 20fps which basically means that a script will be halted if it takes longer than 1/20th of a second. It doesn’t scale very well, so if there are a hundred scripts running aggressively then the overall engine will run poorly. Like I said, this is an active area of research and optimization, so bear with me. In most levels/mods it’s fine.
You can adjust the slider to change the target framerate. At the extremes, “Infinite” will mean that the COG will continue to run until the message is completely finished. This could result in an engine lockup if the COG script has an infinite loop.
Contrarily, “Single Step” means that only one VM instruction will be executed, per script, per frame. This maximizes framerate and virtually removes COG overhead from impacting engine performance; however it could mean that even normal COGs will react very sluggishly. Something as simple as selecting and firing a stormtrooper rifle might have considerable sluggishness even if the overall engine is running very efficiently.
At this time, it is suggested that the default of 20fps is kept.
Frame recording
The Record / Clear buttons can be used to control frame recording.
This functionality is useful for physics debugging, where a bad calculation in a single frame can have an untoward effect on the resulting physics.
When a frame recording exists, the overall game camera is changed to a ghost camera that you can move around independently of your player character.
The slider allows you to examine the game world on a per-frame basis.
However, please note that this is primarily a development tool and its stability for all gameplay elements is not gauranteed.
Other stuff
The draw physics debug info and the listbox of resources is kinda half work-in-progress and half abandoned. Not useful.
Cell & Portal
This is the visibility determination engine. The standardized name is Cell and Portal but in JK it’s known as Sector and Adjoin. The terms are interchangeable.
- Use
If disabled, the entire level is rendered. This option exists for debugging purposes; I suggest you leave it on.
- Use C++ implementation
Enables use of the C++ implementation of the cell and portal algorithm, which generally runs 2x faster.
- Mark Camera / Clear Camera
Using this to set a camera point will make a tiny rectangle that represents your camera view at the point you set the mark. Polygons are rendered for the first-level adjoins (portals) in the scene. The cell and portal algorithm is locked to that location even though you can move freely. Again, this is for rendering engine debugging.
- Debug Tools
For analyzing the cell and portal algorithm in detail. Requires a camera position to be marked. The cell and portal Use option must be enabled but the C++ implementation option must be disabled.
Renderer
Auto-Configure
Adjusts various settings to achieve an overall preset.
- Nostalgic
Reduces quality of a number of things to give more of a historical late ’90s sort of aesthetic.
- Enhanced
Sets everything to what I believe is the best experience.
Render Passes
You can turn on/off total rendering of these components. This is primarily for development purposes.
- Base Geometry
This covers most sector surfaces.
- Translucent Surfaces
As the name suggests, this is typically glass and forcefields.
- Special
For sectors, I don’t think this actually does anything.
- Things
As the name suggests, this completely enables or disables the rendering of Things.
Lighting
Without light, everything is black. You can control which factors add to light in a scene with these options. This is primarily for development purposes.
Static - Level
- Sector Extra
The “extra light” component of sectors.
- Surface Extra
The “extra light” component of surfaces.
- Vertex
Vertex lighting as calculated by static light sources in the level editor.
The Colored checkbox controls whether MOTS colored lighting RGB values or the basic light intensity value should be used.
- Emissive
Applies an additional emissive lightmap texture for 8-bit MATs that use self-illuminated colormap entries.
Static - Thing
- Sector Ambient
This is what lets static level lights, which normally result in sector vertex lighting, also affect Things. Basically this is the baseline light level of the room a Thing is in.
- Sector Extra
Adds the “extra light” component of a Thing’s sector add to its overall light level.
- Self
Self-illuminated things such as dynamic light fixtures and blaster bolts can emit dynamic light, and for performance reasons, can be treated as a uniform light source from the thing that serves as the light. Even the player (with fieldlight off) has a small light value. Experimentally it was found that even the player’s low light level has the effect of uniformly lighting the player rather than the effect of other typical dynamic light sources.
Miscellanous
- Dynamic Lights
This controls, overall, whether dynamic hardware lighting is used during the render.
- Shadows
Enables omnidirectional point shadows. Special thanks to SomaZ for his work on this.
- geo
Temporary option; if enabled, the shadow framework will attempt to build the depth cubemap in 1 pass rather than 6 separate passes, which should improve performance. However, Smith is currently running OpenGL 3.1 and so geometry shaders are not officially supported so this may not work. Turn off if shadows don’t work for you.
- 3D Model LODs
Enables use of 3do level-of-detail meshes. On modern hardware, JK’s polycount really doesn’t warrant LODs so this really only makes sense to enable if you want that nostalgic feel.
- Color extensions
Enables use of Smith logic to automatically determine color for dynamic lights rather than just being white.
More stuff
- Exposure / Gamma
Effectively controls the brightness/contrast of the world (part of HDR rendering).
- Texture Upscale
This controls whether or not textures are upscaled. If enabled, every single texture is upscaled 3x using an algorithm intended for converting low-resolution game graphics into high-resolution.
- GPU Mipmaps
Generates texture mipmaps rather than loading them. Actually, Smith does not currently use mipmaps in a MAT so this effectively serves to turn mipmaps on or off completely.
- Anisotropic texture filtering
If enabled, uses the highest level of texture filtering your graphics card provides; usually 16x. This has the effect of sharpening the texture on surfaces that run somewhat parallel to the camera view angle, and has no effect on face-on textures. There’s really no point to disabling this because it makes everything better with effectively zero performance impact.
- Antialiasing
This is multi-sample anti-aliasing (MSAA). A discernable difference was found between 1, 2, and 4x MSAA; 4x being the best. No important difference was found between 4x MSAA and higher levels. I suggest you leave it at the default.
Additional stuff
- Bump maps
Is what you think it is.
- Particles upgrade
New method for particle effects rather than single-color opaque squares.
- Bloom
Overbrightened areas have a glow.
- Bit-crush
Proper simulation of low-colordepth displays, as was de facto in late 90’s.
- V-Sync
Is what you think it is.
- Hint Bubbles
Adds in-game tooltips for powerups and stuff that can be activated, etc.
- Field of View
Is what you think it is.
Audio
- Allow Music
Is what you think it is.
- Doppler
Uses velocity of things and the listener to simulate doppler shift effect. It’s subtle. Probably easiest way to notice it is alt-firing grenades and listen to the bounce if its going away from you versus coming towards you.
- Automatic environmental audio effects
Uses a variety of algorithms to determine the environment of which you are in, and applies a reverb effect appropriate to its findings. The Material Attribute Editor in NED can be used to modify the database.
- Geometry based audio occlusion
Attenuates audio by level geometry- basically meaning if you duck back into a hallway then a sound from the room ahead will be quieter. The direct / reverb occlusion values defined in the Material Attribute database control how this happens.
- Environment Properties
Shows the reverb parameters currently in effect; alternatively allows you to override them and test various other values. The Copy and Paste buttons are a development tool to generate a reverb definition intended to be used within the source code.
Network
Here’s all the network stuff. Your player name goes up top. The next fields are the target IP, if you want to connect to someone, and the port of that remote host. Then there’s your Connect button. Alternatively, there’s the Host button.
The Players listbox shows the net peers.
The bottom area is a box I forget what for and might not display anything. Shrug
Debugging Data
Log File
A logfile is created in the same directory as Smith.exe. This follows the format of “smith_6250_MMDDYYYY.log” where MMDDYYYY is the current date and “6250” is the local multiplayer listen port.
Note that this log file is deleted upon normal closing of Smith. You can inspect the log file while Smith is running, or use Task Manager to kill Smith.exe in order to preserve the file. Further, if Smith crashes outright then this log file is naturally preserved.
Dump
When the dump data option is on, every resource file that is loaded is dumped to the hardcoded path c:\Smith\tmp.
This includes both raw inputs such as .uni .jkl .3do .cmp, as well as intermediary formats such as bitmaps of textures before and after upscaling and mnemonic dumps of compiled COG scripts’ VM assembly language.
The “-nodump” commandline argument can be used to force disabling of the dump data option.
Note that currently the dump data option is not configurable and is only enabled in Debug builds of Smith.